Changing DNS Zones (MX, CNAME, and A Records) in cPanel
Changing DNS Zones (MX, CNAME, and A Records) in cPanel
Posted on : 15 Dec, 2022 | Last Update - 2 years ago
With cPanel, users are granted access to make some DNS changes from within the control panel.
DNS Zone Functions
The following information will assist you in understanding the purpose of each DNS zone.
Name Servers
The name servers assist in finding the server and correct DNS zone for a domain to get the information on the other DNS zone records. Name servers translate domain names into IP addresses and tell the internet where to look for a domain's IP address.
If a domain was purchased from HostGator and we're your current registrar, you can update your name server within your Customer Portal.
What does it look like?
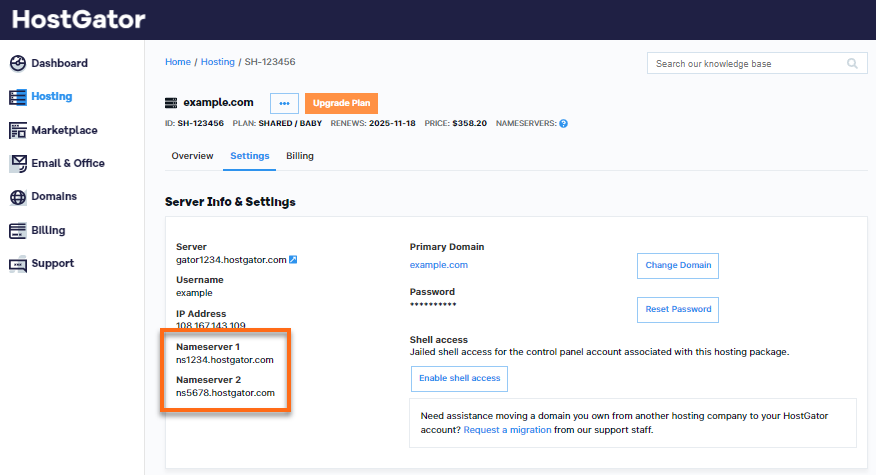
To know more about your name servers, please visit the article, What Are My Name Servers?
A Record
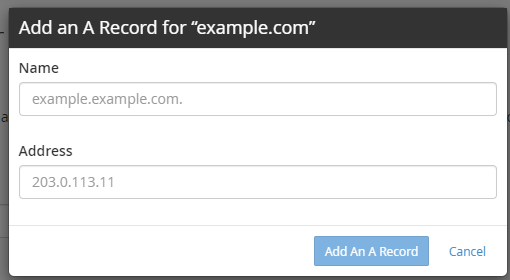
The A (address) record connects the domain to an IP address. This is one of the primary records used in DNS servers, and one of its functions is to tell us where a website is hosted.
What does it look like?

Where do I find my domain's IP address?
Depending on your host, you can find the IP address assigned to your domain in a control panel. For HostGator, you can find it within your Customer Portal and cPanel. For more information, please check out the article, What is My Server Address?
CNAME Record
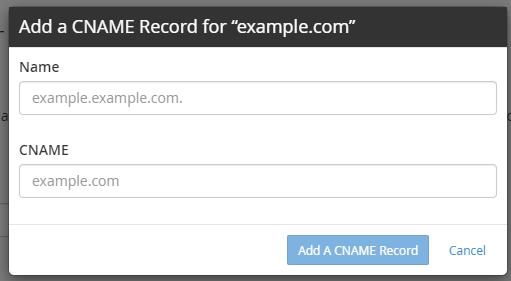
The CNAME (canonical name) records are used to alias a domain or subdomain to another. It points subdomains to another domain name like www and mail and never directly to an IP address.
What does it look like?

MX Records
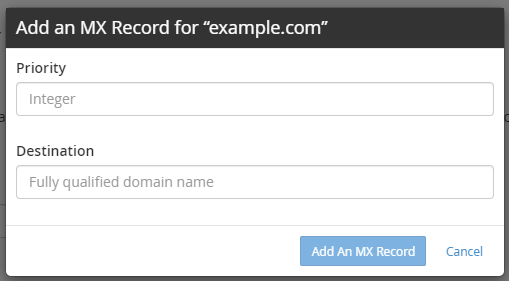
The MX (mail exchange) records control where emails are received. They basically tell your server where to deliver your emails. Depending on your email host, MX records vary. Some may have multiple MX records, like Google Workspace, and some may only have one, like HostGator.
Setting up your emails requires the following:
- MX record - Your preferred email host will provide this (usually referred to as the "destination").
- Mail's A record - This is the IP Address pointing to your preferred email host.
- Email routing - This is your email delivery method.
If your domain uses HostGator's name servers, your emails are automatically set up to use our servers.
What does it look like?

For more information about MX records, you can visit the article, How to Set Up Your MX (Mail Exchange) Record.
TXT records
The TXT records are custom records that contain machine-readable data. TXT records must be formatted according to whichever technology you use. One of its purposes is validating ownership. A provider may require you to add a TXT record in your control panel to prove ownership of your domain.
What does it look like?

How to update DNS records
- Log in to cPanel.
- Look for the Domains section, then click Zone Editor.

- On the next page, locate the domain name you need to edit.
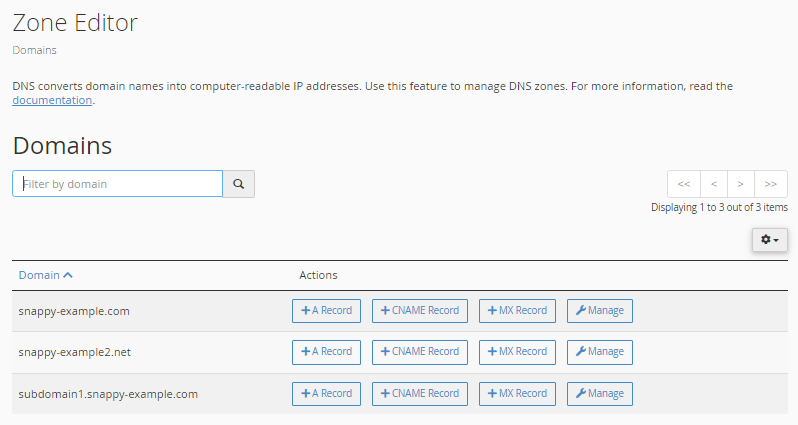
- Click Manage to view the domain's complete set of DNS records.
- Locate the DNS record you wish to update.
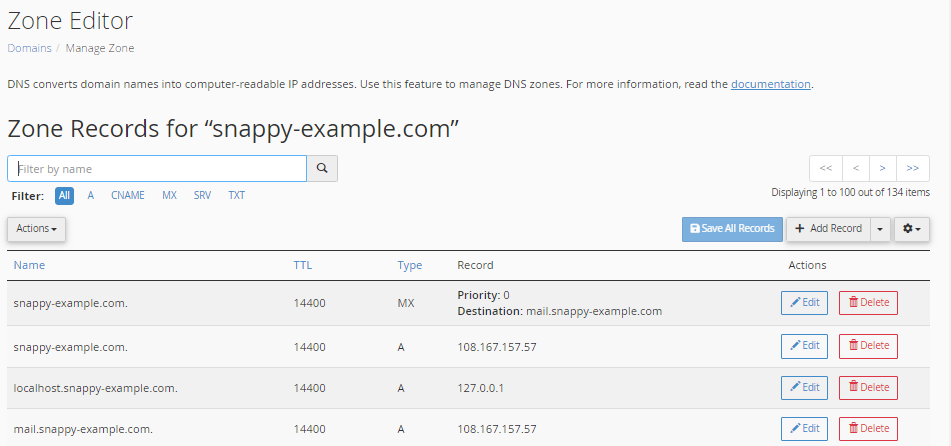
- Make the necessary updates.
- Select Edit to update the DNS record, then click Save Record.
- Click on the Delete button to remove a DNS record. A confirmation popup will appear. Click Continue.
How to add DNS records
There are two ways to add a new DNS record to your cPanel.
Option 1
This method only applies to A, CNAME, and MX records.
- Click the appropriate + button in the Zone Editor section.
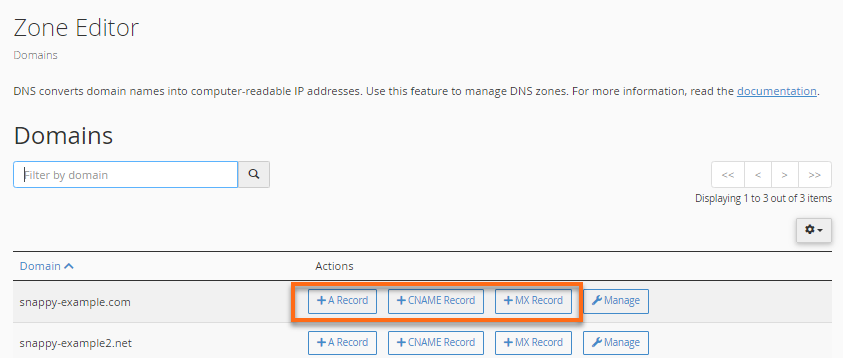
- Enter the necessary details.
A Record
CNAME Record
MX Record
- Click on the Add button.
Option 2
For this method, aside from the A, CNAME, and MX, you can also add an AAAA, SRV, and TXT record.
- Locate your domain in the Zone Editor section, then click its Manage button.
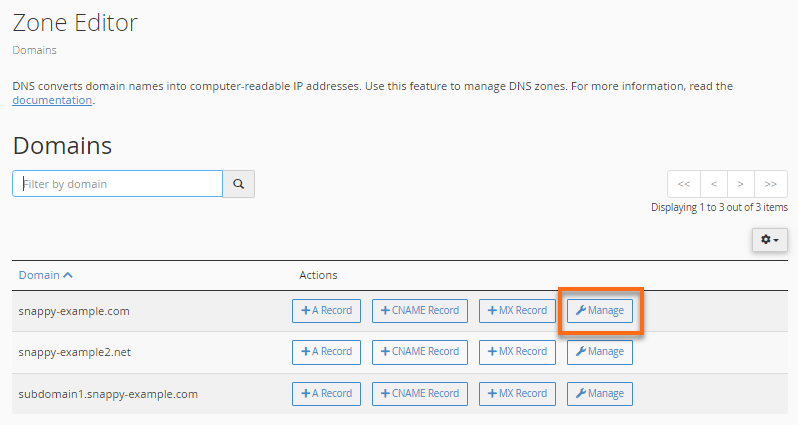
- Click the +Add Record button located on the right side.
- Select the DNS type from the dropdown, then enter the necessary details to complete.
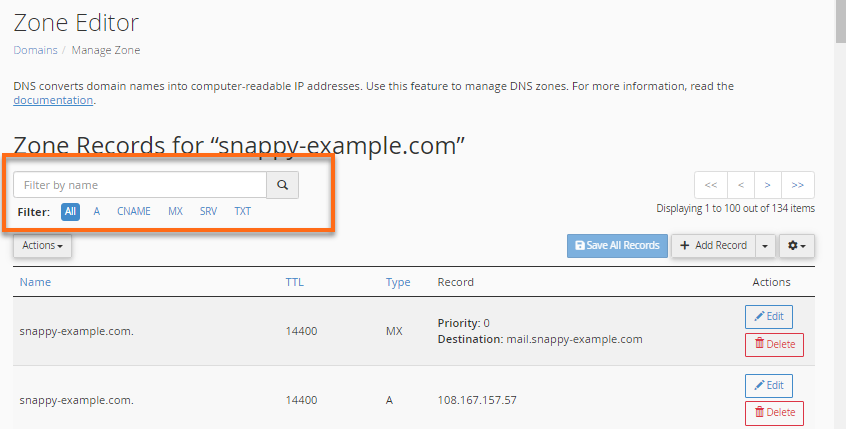
- Click Add Record under the Actions column.
Other Categories
Still No Luck ? We can help you
Create a ticket, we’ll get back to you as soon as possible.
Submit a Ticket